FortiGate 环境搭建 7.2.7
前置
部分内容在FortiGate 环境搭建 7.2.4中,本文将不再赘述。本文仍然用的重打包的方式获取shell
FortiGate 镜像下载
本文搭建为当前最新版7.2.7的FortiGate
登录
设置IP
config system interface
edit port1
set mode static
set ip 192.168.x.x/255.255.255.0
end然后通过gui开启ssh、telnet等
挂载 vmdk
sudo guestmount -a FortiGate-7.2.7-disk1.vmdk -m /dev/sda1 --rw ./FGT
flatkc
使用vmlinux-to-elf将bzImage转成elf
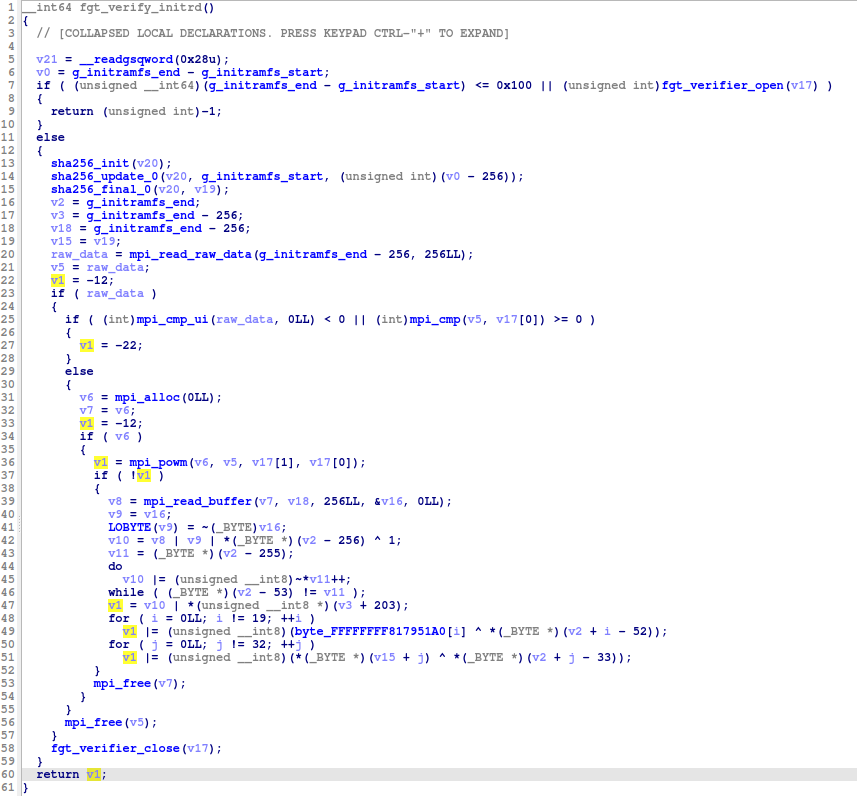
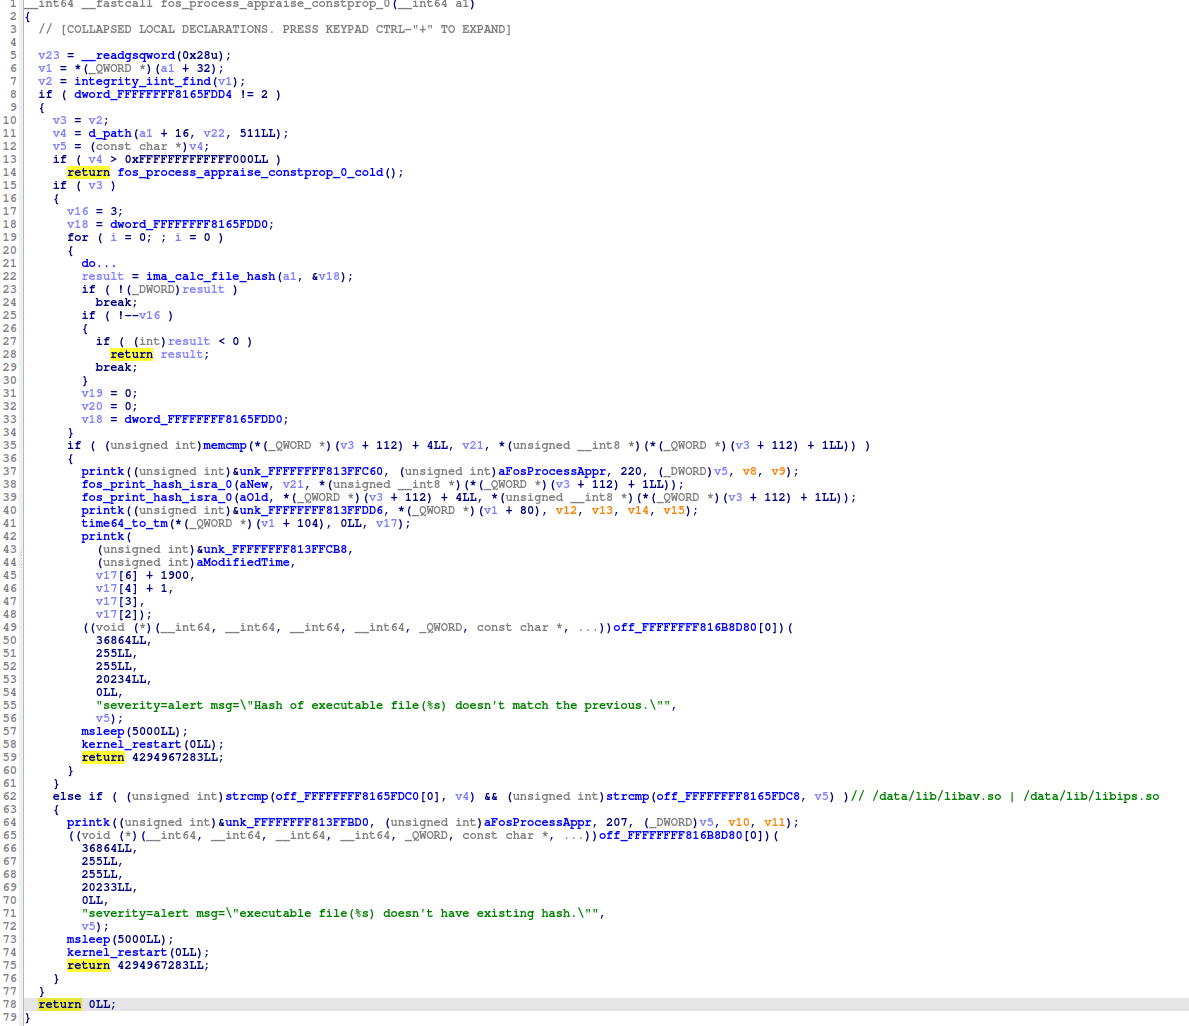
其中存在的检测:
- 在
fgt_verify_initrd()中,对于rootfs.gz的末尾0x100字节为签名,因此需要patch其返回值为0,并且在重打包roofs.gz的最后加入0x100个字节

- 在
fos_process_appraise_constprop_0()中,对于运行文件的hash值进行判定,因此需要在函数的最开始patch成xor rax, rax; ret

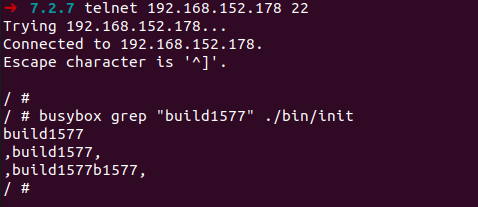
最后patch/sbin/init字符串变成/bin/init,自己手动对于rootfs.gz重打包时,把/sbin/init的工作做了(即解压bin、migadmin、node-scripts、usr)
/bin/init
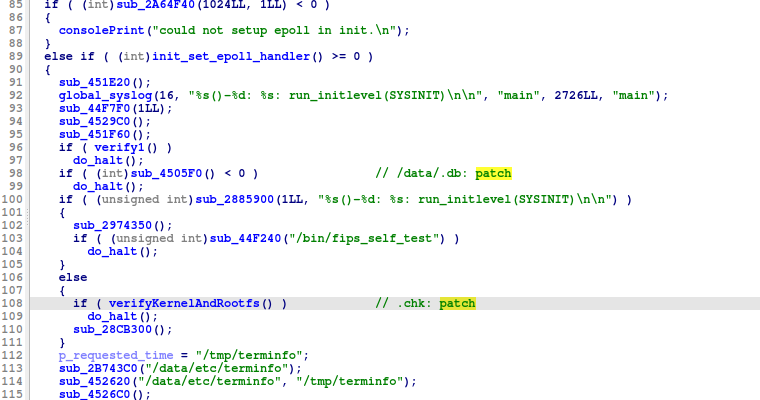
存在如下检测:
- 检测
/data/.db和.chk,因此我把从调用到返回的条件跳转全部patch成nop

- 还有一个对于
/data/.db的检测在sysfile_moniter中(这个是我重打包之后,最后才发现的,因为最后在出现login字段后,出现了System file integrity monitor check failed!\n的字符串然后系统关机了,于是我给message函数下了个断点,最后定位找到了),因此我也把从调用到返回的条件跳转全部patch成nop

绕过
思路
- 重打包
rootfs.gz:注意尾部添加0x100个字节- 利用
chroot . ./bin/xz | ./bin/ftar解压bin、migadmin、node-scripts、usr - patch init 文件中的
main和sysfile_monitor中的检测 - 添加
/bin/busybox和/bin/gdbserver
- 利用
- 调试虚拟机内核时修改
flatkc中的指向/sbin/init的字符串为/bin/init diagnose hardware smartctl开启telnet
// gcc ./smartctl.c -static -o ./smartctl
#include <stdio.h>

void shell(){
    system("/bin/busybox ls", 0, 0);
    system("/bin/busybox id", 0, 0);
    system("/bin/busybox killall sshd && /bin/busybox telnetd -l /bin/sh -b 0.0.0.0 -p 22", 0, 0);
    system("/bin/busybox sh", 0, 0);
    return;
}

int main(int argc, char const *argv[])
{
    shell();
    return 0;
}
操作
首先给虚拟机的vmx加上如下语句,利用debugStub的特性对虚拟机进行调试
debugStub.listen.guest64 = "TRUE"
debugStub.listen.guest64.remote = "TRUE"
debugStub.port.guest64 = "10045"
debugStub.listen.guest32 = "TRUE"
debugStub.listen.guest32.remote = "TRUE"
debugStub.port.guest32 = "10046"
toolsInstallManager.updateCounter = "2"
tools.remindInstall = "FALSE"解压rootfs,直接用cpio -idmv < ../rootfs
解压的时候xz为其自己实现的,因此要用如下指令,将压缩的全部解压
chroot . /sbin/xz -d usr.tar.xz
chroot . /sbin/ftar -xf ./usr.tar
重打包的指令如下
find . | cpio -o --format=newc > rootfs
gzip rootfs
dd if=/dev/zero bs=1 count=256 >> rootfs.gz

guestmount -a FortiGate-7.2.7-disk1.vmdk -m /dev/sda1 --rw ./FGT
cd FGT
cp ../xxx/rootfs.gz ./
cd ..
umount FortiGate在开启FortiGate之后出现如下字样后(如果没断成功会重启再断下来的),进行远程调试,断在fgt_verify_initrd()的返回,修改其返回值,并修改其字符串为/bin/init\x00
Loading flatkc... ok
Loading rootfs.gz... ok以下是写的一个script(注意这里debugStub起的是主机的端口)
target remote 192.168.152.1:10045
# modify return value
b *0xffffffff8170b5ce

# modify to /bin/init
# b *0xFFFFFFFF80C5D339
# b *0x452c2e

define patch
    set $rax=0
    set {char [10]}0xFFFFFFFF813CB87C="/bin/init"
    set *(char *)0xFFFFFFFF80541C64=0x31
    set *(char *)0xFFFFFFFF80541C65=0xC0
    set *(char *)0xFFFFFFFF80541C66=0xC3
    x/s 0xFFFFFFFF813CB87C
    c
end

c
最终效果

gdbserver
调整telnet到162端口,gdbserver起在161端口,可以开启snmpd的SNMP Agent以及v2c,对于interface port1也开启SNMP,然后killall -9 snmpd && /bin/busybox telnetd -l /bin/sh -b 0.0.0.0 -p 162,再在web中关闭snmpd,就可以连接telnet ip 162了,这样gdbserver就可以是用161端口
再通过killall -9 sshd,重启sshd
其他
patch init 直接用 radare2 ,非常的方便
FortiGate中一些重启的包装函数为flatkc中的kernel_restart和init中的do_halt、reboot(xxxx)
vmware debugstub 断点只能下四个,因为是下的硬件断点,这个折磨了我好久,最后我发现只能下几个断点之后,f1ys0ar师兄才告诉我因为硬件断点(想死的心都有了
一些检测是plusls当初帮我制作7.2.6的shell时候告诉我的,感谢plusls大佬
>= 7.4.0是用的chacha20对于rootfs.gz进行加密的,当时发现调试时解密的密钥和我直接用flatkc提取的不一样,最后发现是没用.encode("raw_unicode_escape")的锅,直接导致转换错误
最后感谢swing和m4x大哥听我一路踩坑
引用
https://www.optistream.io/blogs/tech/fortigate-firmware-analysis
https://paper.seebug.org/3129/
本博客所有文章除特别声明外,均采用 CC BY-SA 4.0 协议 ,转载请注明出处!